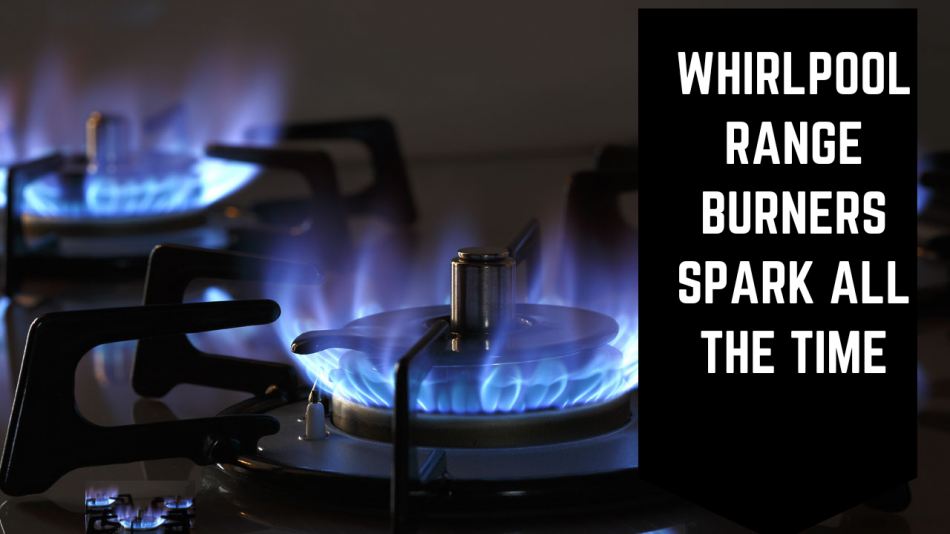
My Whirlpool range burners spark all the time. It’s not just annoying; it can be downright dangerous for a Whirlpool range burner to spark all the time! This post will explain why Whirlpool range burners spark all the time, how range burners work, and a solution to eliminate this issue and make your life more manageable again.
- Understanding your range burner from a technology standpoint, including various components and what they do.
- Repairing the cause of your issue
Understanding your range burner
If you take a look inside your range, you will see that there are three burners, and in one of the burners, you will notice that it comprises two parts:
The burner box is where the controls are, while the “burner” part is what heats up to provide heat to your cooktop.
The burner box contains a switch (three in my Whirlpool Range) used to turn on each burner and an igniter that provides a spark to ignite the gas. The igniter is a small resistor that burns out over time. In other words: It burns out and stops working!
To get your range burner to spark, do the following:
- Close all of the burners and allow them to cool down for 5-10 minutes. This will lessen any risk of burnout since the gas in your range won’t be pressurized.
- Open a burner and press down on your stove knobs so that all the burners are on a high, full speed.
- Wait for about five minutes, then shut off your stove completely (DO NOT just turn it off).
- Wait another 5 minutes, and then turn your stove back on.
By turning the burners off, you are clearing out any gas that is left in your system. This allows it to be safe for you to work on the range. After about 5 minutes, it will clear out the gas so you can safely work on your range.
If you try to light just one burner at a time and none ignite, it means that something inside the burner box is defective and needs to be replaced. Suppose you continue to have a problem; try the above process again but do NOT turn one of the other burners on while working on it. In other words: Try only to light one burner at a time.
In many cases, the gas igniter will last far longer than five years (reports vary from 5-15 years). However, sometimes it is out of round, or there is corrosion inside the igniter, and occasionally (often) something inside that is broken, causing it to be defective.
Depending upon your particular range, you may need to replace more than just one part, like the igniter, because sometimes more internal wiring has corroded or broken, causing problems.
If your burner’s igniter is malfunctioning, you may typically fix the problem relatively quickly. Often you can replace the igniter without removing the burner box at all. Heating element repair kits on Amazon contain all the parts needed to replace your igniter. After you get everything set up, you ought to be ready for the next five years!
Before you begin, please note that a replacement heating element kit comes with its potential hazards. If you do not feel comfortable working on this kind of thing, hire a professional.
If the gas pressure is too low, it won’t ignite your burner; however, if your range igniters are working correctly, regardless of the gas pressure, your burners should light on high all the time. This problem is 100% under the control of your range’s wiring inside the stove itself and therefore using a different solution.
Repairing the cause of your issue
Now that you understand how your range burner works and have identified the problem, there is only one thing you can do: Repair it. This section will explain how to do so.
The purpose of this repair is to install a new igniter into the burner box. Once installed, you should be set for at least another five years! Removing your range and disconnecting the electrical components is usually unnecessary, but if you are comfortable doing so, repair it with the below guide.
- Remove all the knobs from your stove and the lids that hold them in place. Also, remove the screws which hold the range to your countertop.
- Take your stove top off and place it on top of something (like a chair) so you can work underneath without any danger.
- 3. Remove the burner grate/layer by simply pulling it up and out of the way towards your back.
- On each burner, you will see a small square metal plate with four screws holding it in place.
- Unscrew all four screws completely, gently pull the metal plate up and off, and then set it to the side for now. You will see a small squared wire plug.
- Unscrew the black wire plug and remove it completely. Be careful with this part; if you damage it, you will have difficulty getting any new parts as they are only available from Whirlpool.
- You should now be able to remove the burner box altogether, exposing the burner mechanism itself.
- Now that you have exposed the inside of your range, you can unscrew the old igniter from its mount and replace it with your new one.
- Before you screw the new igniter into its mount, ensure that the little spring is in place, and the wire is pointing forward. Then tighten it into place using your fingers.
- Put everything back together in reverse order of how you took it out, and you are done!
Replacing a defective range burner box
There are reports of some Whirlpool ranges having a notorious issue where the flame isn’t high enough when cooking at full power on all burners. This problem is not to be confused with burner ignition, in which your burners will not ignite. The problem is actually with the burner box itself.
If you have this problem and your burners are still working properly, look at what might be wrong. The two most common issues are:
- The gas regulator.
- The igniter.
Both of these parts are in the same box, and it is possible that if you replace just one of them, you will be good to go for another five years without issue!
What is a gas regulator?
A gas regulator ensures that your burners light at full power every time you turn on your range, which is perfect for getting a nice brown crust but not suitable for anything else. It is what keeps your kitchen smelling like a great Italian restaurant!
A gas regulator comprises several parts: a float, a blade, and an arm. The float (usually held in place by four screws) sits inside the box, and when you turn on your range, it moves up and down, regulating how much gas fills each burner as it reaches a certain point. It does this by entirely or partially depressing or turning off the gas to that burner.
If you are familiar with car ignitions, when you turn on your stove, the spark from the flame will either be consumed entirely by the burner, or it will have no effect at all, and therefore no flames will come out of it.
What is an igniter?
An igniter is responsible for lighting your burners. Each burner has its igniter, so if you are having problems with only one of your burners, chances are you need to replace it. This component is usually held in place by a single screw.
Replacing the gas regulator or the igniter is a straightforward process. You won’t need expensive lab equipment, advanced chemical or physics expertise, or even 30 minutes to do it. However, to begin, you will need to take the cover off your range to gain access to the burner box.
- Remove the burner grate and set it on top of something like a chair. To remove it, you must do nothing more than pull it out. This is because once you have taken the grate off, you won’t be able to put it back on without getting under there again.
- Remove the screws holding in the burner box cover and remove them entirely.
- Find your gas regulator or igniter on each burner and pull them out; this could be either one.
- You may easily remove the regulator by locating the screw holding it in place, and unscrewing it. The igniter will be similar in design but attached to a square wire mount and should be easily removed.
- Once removed, you can replace them with your new parts as long as they are compatible with the model of range you bought.
Conclusion
We discovered how to troubleshoot gas cooktops. Please keep in mind that this is only a tutorial, and we sincerely hope it was helpful to you. Of course, you can always get a professional to do the job, but at least you have some knowledge.